FRIDAY’S 5IVE!
Don’t Get ‘Trapped’ Into Thinking it’s just the Traps!
It’s really easy for us to assume that the most visible muscle on our body is the cause of pain or imbalance, when in reality it might be from a deeper tissue in the body. Yes, the larger muscles DO more work, but it’s all those sneaky smaller muscles that are what create our stability and really help with our range of motion.
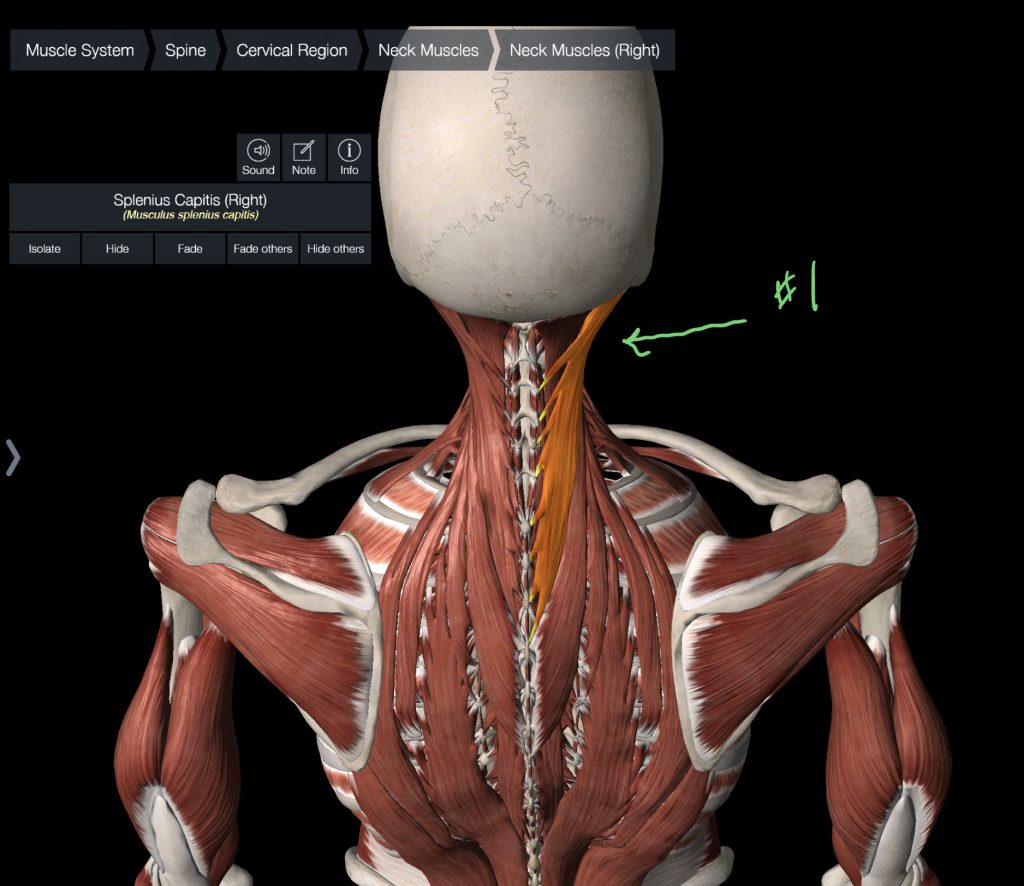
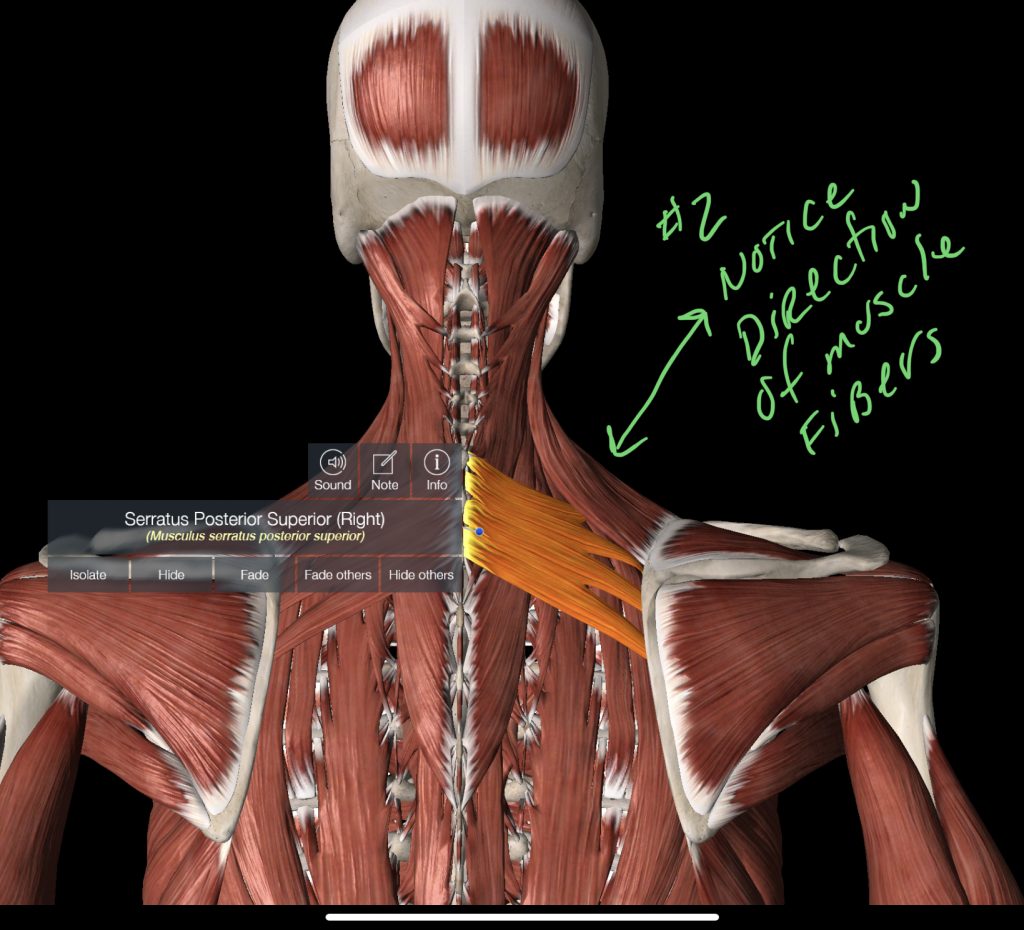

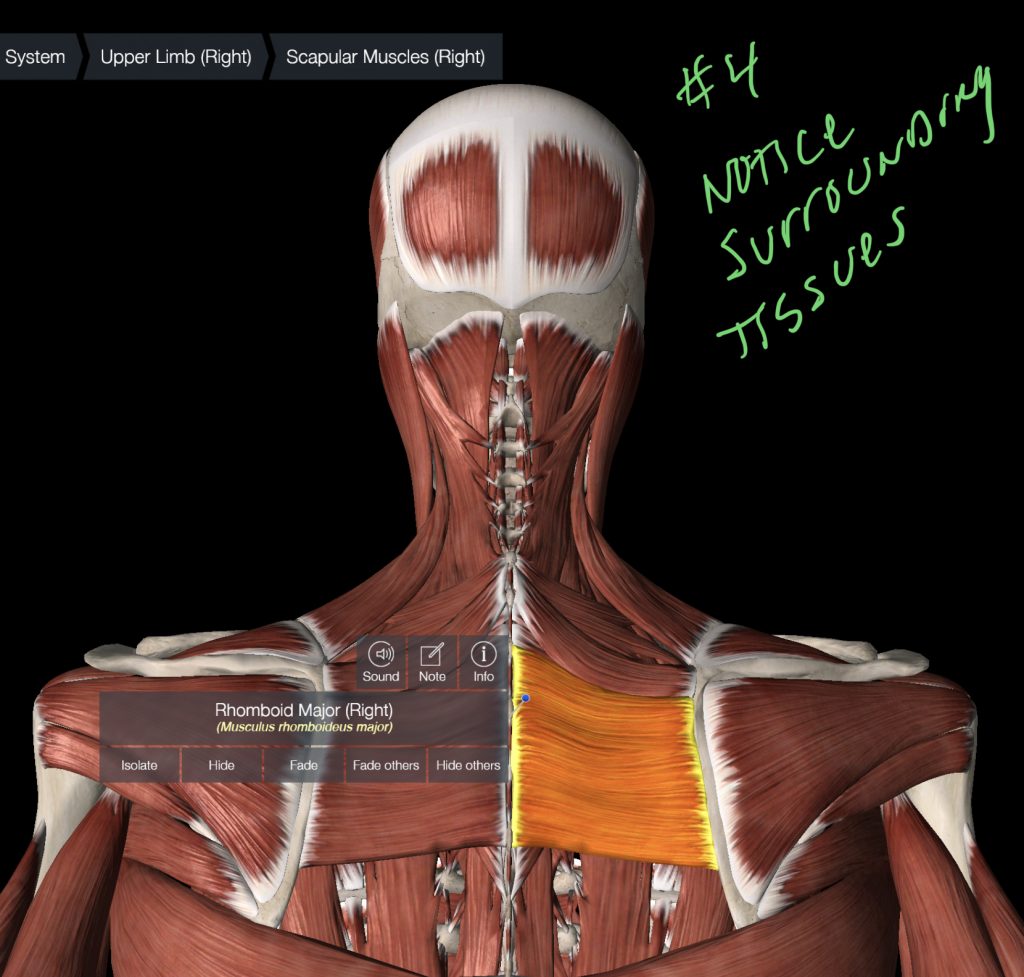
In the first picture you see the first few layers of muscles that attach not only to the spine, skull, ribs and shoulders. The 2nd picture is the next layer of tissue that can really affect how your scapula/neck/shoulders move. In the third picture (and 4th) you have the Rhomboids – you know that pesky spot where you sometimes find yourself with a knot that affects how you move your head and shoulders?
We have to remember that what affects one piece of tissue can have a cascading effect elsewhere in our body. That stiff neck may actually be caused by a tissue downstream. That shoulder that doesn’t have complete range of motion? You might want to look at the tissue up close to the skull. You have to explore all the areas in your body that you feel tightness, and the best way is to move slowly and explore your range of motion. Notice where you feel the limitations.
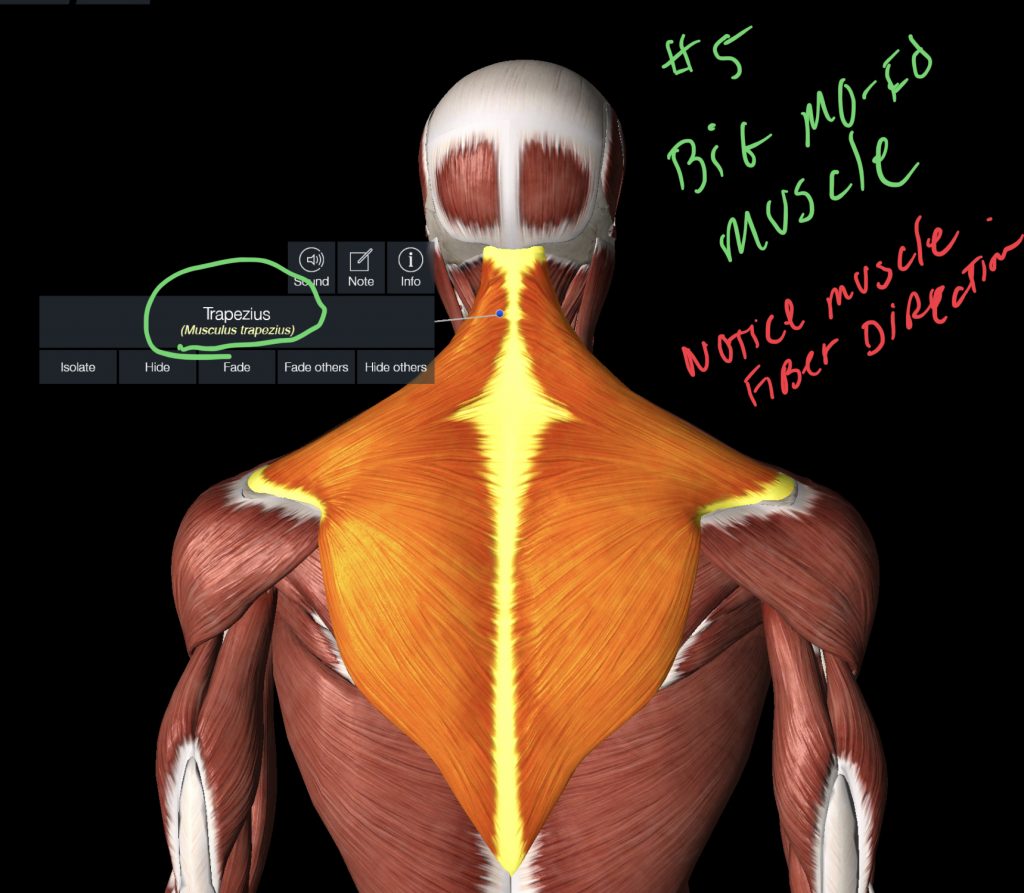
Now let’s look at the size of our Trap’s (Trapezius). Notice where the tissue starts, and inserts. There are so many ways to get this tissue to relax that it’s not even funny. I do have a few tricks up my sleeve that you can do on your own this week to help not only your shoulders release tension, but also your neck and low back.
MOVEMENT #1
Get a nice long foam roller that isn’t too gnarly. Lay on that foam roller right down the spine, with the back of your head on it, and your hip bones on it as well (so a short foam roller DOES NOT work here). Bend your legs and have your feet standing on the ground in a position where you don’t have to work to keep the legs there. In other words just imagine that you are outside on a starry night, and you are just looking up at the sky, with your legs bent and relaxed. (Step 1) Now you are going to rock side to side as if you are on a boat. Rock for as long as you feel like rocking. (Step 2) Now you will tilt your pelvis forward and back as if pouring a bowl of milk out, and then settling it back. This is a very subtle movement, and don’t try muscling it, just a gentle tip then tuck. (Step 3) With your arms down by your sides on the ground you will have your palms facing down. You will keep arms off the ground and reaching with fingertips towards your heels. Reach, and turn your head to the left, rest, then Reach again and turn your head to the right. Repeat this until you feel the muscles in the neck relax. Then you can go ahead and Rock Your Boat again for a few seconds.
MOVEMENT #2
This is one of my favorites – but it’s in video!
This is a longer video, but once you get the movement patterns down you can condense it to just a few minutes into your practice, or depending on what activity you are doing for the day. I can’t recommend Alfons enough, as his video’s have done more for my body than any massage/chiro, etc has ever done for me. And it’s FREE!